To make a custom birthday gift box, measure the gift first, pick a base (DIY template, blank kraft box, or online print service), then layer personalization in three stages: structural (box + lid), surface (color/pattern/text), and interior (filler + arrangement). Plan on 30 to 90 minutes and anywhere from $3 to $30 depending on which path you choose.
Decide Your Starting Point: Build, Blank, or Print-On-Demand
Three paths, and the right one depends mostly on budget and how much time you want to spend hunched over a cutting mat. Building from scratch with cardstock templates costs the least and demands the most precision. Buying a blank kraft box and decorating the surface sits in the middle. Ordering a print-on-demand box gives you a commercial finish but you’ll pay for it per unit.
A blank kraft box from Michaels runs about $2.99 to $5.99. You cover that base with acrylic paint, washi tape, custom labels, whatever. Print-on-demand services like Packlane let you design a box online and print it directly onto corrugated. Packlane’s MOQ is one unit, which is unusual in this industry, but a single custom mailer typically lands somewhere in the $15 to $30 range before shipping.
| Path | Cost | Time | Skill | Finish Quality | Best For |
|---|---|---|---|---|---|
| DIY Cardstock | $1 – $3 | 60-90 min | High | Handmade | Small, lightweight gifts |
| Blank + Customize | $3 – $8 | 30-45 min | Low | Semi-Pro | Standard gifts, fast turnaround |
| Print-On-Demand | $15 – $30 | 10 min (+ shipping) | None | Commercial | High-budget or fragile gifts |
Size the Box to the Gift (Not the Other Way Around)
Measure the gift’s longest dimension and add 6 mm of buffer per side to get your interior dimensions. Most DIY tutorials hand you a static template and expect you to wedge your gift into whatever cube it produces, which is backwards. Packaging engineers use specific clearance buffers for a reason: items rattle, or they get stuck, or the walls bow out.
For rigid items (a ceramic mug, a framed photo), add 3 to 6 mm of clearance on width, length, and depth. If you’re planning to pack it in with wood wool or similar thick filler, bump that up to around 12 mm per side.
When you’re building a two-piece box with a telescopic lid, the lid has to be mathematically larger than the base. Add 2 to 3 mm to the lid’s interior dimensions versus the base’s exterior dimensions. If you cut them the same size, one of two things happens: the lid tears the base corners going on, or you get a vacuum seal that traps the gift inside and the recipient looks like they’re wrestling a pickle jar.
Common birthday gifts and suggested interior dimensions:
- Standard coffee mug: 12 cm x 12 cm x 12 cm (room for the handle plus crinkle paper)
- Folded t-shirt: 25 cm x 30 cm x 5 cm
- Small jewelry box: 10 cm x 10 cm x 5 cm
- Hardcover book: 18 cm x 25 cm x 5 cm
Choose Materials That Won’t Betray You
Standard printer paper weighs 80 GSM and will collapse under the weight of a gift. For structural walls, use paperboard at a minimum of 300 to 350 GSM (that’s roughly 14pt to 18pt cardstock in US terms). Lighter 150 GSM stock is fine for decorative lid overlays or interior liners. Never for the load-bearing base.
Adhesive choice is where most DIY boxes quietly fail a week later. Liquid craft glue introduces moisture, which warps 300 GSM cardstock and leaves those sad wavy edges along every seam. Hot glue dries too fast and leaves lumpy gaps between the paper. Paper crafters on r/papercraft keep pointing to heavy-duty double-sided tape, Scor-Tape specifically, for 3D box assembly. Instant flat bond, no warping, no lumps.
For the exterior, matte cardstock takes ink well if you’re stamping or writing by hand. Glossy or coated cardstock resists smudging but it needs permanent markers (Sharpies work) and it will reject most water-based craft glues outright.
Match the Design to the Recipient, Not the Trend
A box that actually lands uses a specific formula: age bracket × relationship × personal aesthetic = design direction. Reaching for generic pastels or kraft-and-twine every time ignores the person you’re giving it to.
Child under 10. Prioritize tactile stuff. Bright primary color base (300 GSM yellow cardstock, say) with interactive elements. A magnetic closure they can snap open and shut. Puffy stickers. The box ends up being a secondary toy, which is the point.
Teen or young adult. The unboxing is the gift, basically, because it’s going on their camera roll. Use a matte black or stark white blank box. One bold vinyl decal with their name in a clean sans-serif. Minimalist exterior, loud interior filler to contrast.
Romantic partner. Texture and memory. Deep saturated color (navy, forest green, burgundy) and a wide wire-edged ribbon. Tape a handwritten note or a printed photo to the underside of the lid so it’s the first thing they see when they open it.
Parent or older relative. Classic finishes. Rigid, fabric-textured base. Foil stamping or metallic embossing powder for their initials. Nothing messy. Loose glitter is a betrayal and confetti is worse.
Three-Stage Personalization: Structural, Surface, Interior
Personalization works in three layers: the box itself, what goes on it, what goes in it. Keeping these separate in your head prevents the finished thing from looking like a Pinterest board exploded.
Stage 1: Structural. The physical shape and opening mechanism. You’re not stuck with squares. Hexagons, drawer-style pull-outs, magnetic flap closures, all of these read as premium instantly. If you’ve bought a blank box, cut a window in the lid and glue a sheet of acetate behind it so the contents peek through.
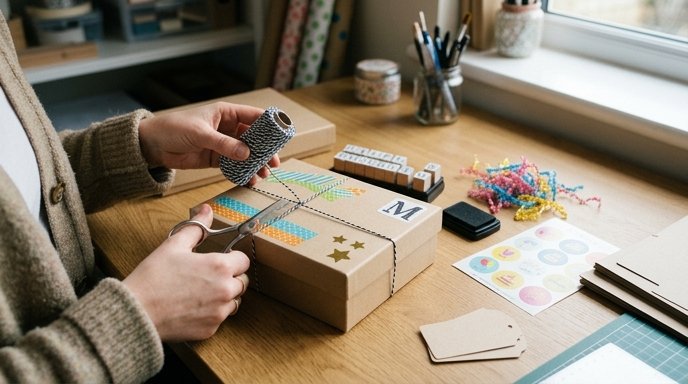
Stage 2: Surface. Exterior visuals. Base color, then typography layered on top. Print a custom label with an inside joke or the actual birthday date. Finish accents: gold foil flakes, wax seals, a band of washi tape around the perimeter. Two dominant colors and one metallic accent, max. Any more and it looks like a kid’s craft project.
Stage 3: Interior. The inside deserves the same attention as the outside. Line the bottom with patterned paper that contrasts with the exterior. Add filler, stage the items, and tuck in a hidden surprise element: a secondary envelope under the tissue, a small wrapped candy in a corner.
Staging the Inside So the Unboxing Feels Intentional
Dropping a gift into an empty box looks unfinished. Filler protects the item and does most of the presentation work, but the materials behave differently and that matters.
Wood wool (excelsior) looks great. It also sheds. You’ll find bits of it on the floor three days later and the recipient will too. It’s at its best in wine and cheese boxes where that farmhouse-y look is doing a job. Crinkle-cut paper offers better shock absorption for anything fragile (glass candles, ceramics) and leaves no mess. Standard tissue paper is really only for soft goods like apparel; it provides zero structural support.
Arrange multiple items using a reveal order. The recipient should process the contents in sequence:
- First: a flat element on top of the filler. A card, or a printed menu of what’s in the box.
- Second: the primary gift, centered and nested deep into the crinkle so it doesn’t shift in transit.
- Smaller secondary items tucked into the corners around the main piece. Lip balm, wrapped candies, enamel pins, that kind of thing.
For a single-item box, fill about 80% with crinkle paper, press a shallow indentation into the middle, and rest the gift in the cavity. Keeps it from sinking.
Common Failures and How to Avoid Them
The number one reason a DIY lid won’t fit is the vacuum effect. Lid and base cut to identical dimensions, air gets trapped, lid floats a centimeter above the base and will not go down. Add 2 to 3 mm to the lid’s interior dimensions and you’re fine.
Bottom tearing under weight. A 300 GSM cardstock base will tear if you load it with glass jars or metal tools. Cut a piece of 2mm chipboard to the exact interior footprint of the base and glue it flat to the floor. Distributes the weight across the whole bottom instead of letting it punch through one spot.
Decorations peeling off. Adhesives fail on incompatible surfaces. Standard craft glue beads up on glossy or coated boxes and peels within a day. Double-sided Scor-Tape for anything heavy going onto a coated surface.
Limp, sad bows. Satin ribbon is slippery, which is why it unties itself and droops. Grosgrain has that ribbed texture and holds a knot. For big structured bows that stand up off the lid, use wire-edged ribbon; the wire core lets you shape the loops and they stay shaped.
Ink smudging. Writing directly on a box, especially coated or kraft, smears. Write on a separate piece of matte cardstock, let it dry fully, then mount it to the lid. The extra step is worth it.
When to Skip DIY and Order Custom Instead
Handmaking one box makes sense. Handmaking ten does not. If you’re putting together favors for a milestone birthday (a 50th, a Sweet 16) and need more than five, DIY turns into a liability fast. Cutting and scoring and folding ten of anything by hand will produce ten slightly different boxes.
Order custom-printed instead. For small batches, Packlane will do as few as one custom mailer, which is honestly wild for this industry. You upload the design and they print directly on the cardboard. For bigger runs, Noissue does custom folding cartons at a 250-unit MOQ.
Whichever vendor you use, look for 3D digital proofs before they go to print. And check the material specs: at minimum E-flute corrugated for mailers, 14pt paperboard for folding cartons. Anything thinner and you’re paying for something that’ll arrive crushed.
FAQs
How long does it take to make a custom birthday gift box?
Building from scratch with cardstock, 60 to 90 minutes once you factor in measuring, cutting, scoring, and gluing. Decorating a pre-made blank kraft box, 30 to 45 minutes. Ordering a custom box online is 10 minutes of design time plus a 1-to-3 week shipping lead.
What’s the cheapest way to make a personalized gift box?
Buy a blank kraft paper mache box from a craft store ($3 to $6) and personalize with stuff you already own: acrylic paint, printed photos, leftover ribbon from last Christmas.
How do you make a gift box without a template?
Score-and-fold method. Cut a square of heavy cardstock. Score a line 5 cm from every edge. Cut one slit on each corner where the score lines meet, which gives you flaps. Fold the edges up, secure the flaps to the adjacent walls with double-sided tape. It’s not the prettiest construction but it works, and if you’re wrapping the exterior anyway nobody will see the seams. One tip: score with the back of a butter knife against a metal ruler if you don’t have a proper bone folder, it leaves a cleaner fold line than you’d think.
What can I use instead of a gift box for a birthday?
A fabric wrap (Furoshiki), a canvas tote, a woven basket, or a rigid mailing tube for anything rolled like posters or t-shirts.